What follows here is a speedthrough install of FreeBSD. There's a lot to be said for the comprehensive method used in most books and tutorials. However, there's also value in the motivation gained from actually making it work, seeing it work, even if you don't understand everything you just did. Then you can go back and learn more about what happened. It's kind of like skydiving: you do an intensive all-day crash course which preps you for a tandem dive. Then you're hooked (once you realize it's not as scary and impossible as you thought) and decide to take the longer, complete course so you can ultimately dive without being strapped to an instructor. So let's dive in, shall we?
This speedthrough assumes the following:
With that out of the way, let's get started. First, a few preliminary check items:
BIOS:
I would highly recommend that you have the latest BIOS for your motherboard. How to go
about upgrading the BIOS
varies from motherboard to motherboard and is beyond
the scope of this document. I'm not saying FreeBSD won't install if you don't
have the latest BIOS, but you
can often avoid problems by doing this. Read your motherboard manual, or
ask a friend. If you just cannot find any help in this area, go ahead and
just try the install with what you have (or post a msg in the forums...
maybe someone can help you there).
This one is a must, though: you need to make sure two particular things are
set proper in your BIOS.
First off, if your BIOS
supports Plug & Play
(PnP) there's usually a setting something like "Plug & Play OS". Make
sure this is set to OFF or DISABLED. This will make sure that the BIOS handles assigning all
resources by the time the OS starts. The other setting you need to check is
to make sure your system will boot from CD. There might be a boot-order screen where you
simply need to make sure that the CD-ROM drive appears before
the hard drive, or it might be a "Boot from CD" toggle on/off or true/false.
Again, this might require referring to your motherboard manual.
Obtaining the CD
You will need to download
the ISO image of FreeBSD 6.1, and burn it to CD using some other
computer. This is the quickest way, but requires that someone know how to do
this. If you don't, find the manual or a friend. Or you could always order the CD
if you're desperate/patient. The money goes to support FreeBSD anyhow.
Note: Burning a CD from an ISO image is not the same
as making a normal data CD. Your CD-burning software needs to support making
CDs from ISO images.
Most do, but some do not. If your CD does not boot the computer after you
make it, you probably made it incorrectly. Put the CD you burnt into another
computer and look at the contents. If all you see is a single file
called 6.1-RELEASE-i386-disc1.iso
then you made it wrong. If your software
doesn't support ISO
images, you can get free software
here.
Let's begin!
You're going to notice that FreeBSD is NOT a
"point-click-point-click-installed!" operating system. It does ask a bit more
from you, the user doing the installing (actually, you're taking on the role
of admin...) But it gives back ooooooh so much more in-return. And
technically, it's "installed" once you can get a login: prompt... everything
else is just gravy. I can usually install to login: in under 3 mins.
Anyways...
Boot the computer with the CD in the drive. (if it doesn't boot, see the note
earlier about ISO
images)
You will see a bunch of stuff fly by the screen. First you'll be asked to
select your country. Use the arrow keys to highlight the appropriate one from
the list and press Enter. At this point you should be at the sysinstall Main Menu . (Hopefully
all your hardware was detected during bootup. If not, you're beyond the scope
of this quickstart. I'd recommend getting a good book.)
Menu usage for dummies
You might want to read the Usage section which explains how to
maneuver through the menus, but it's not critical... you might be able to
figure it out on your own. The general idea is that you use the up/down
arrows and the [Tab] key to move around, and [spacebar] or [Enter] to select.
Like right now, you'll notice that the up/down arrows move the select bar up
and down the different menu items. Hitting [Tab] alternates the bottom select
beween the two options [Select] and [Exit install]. So you're
going to choose an option, make sure [Select] is highlighted
(blue), and then press [Enter] or the spacebar to choose it and move on. On
some menus the [Tab] key might also cycle the the cursor up into the list as
well as the bottom buttons. If you're confused, just keep hitting [Tab] until
you're clear on what's selected and what isn't.
Once you've read the Usage page and/or are comfortable working with the menu,
choose Standard. A box pops up...
read it or not, but you have to select OK to continue.
(If you have more than one drive here, you
might be prompted to select the drive from a list. Figuring out which one you
want can get a bit technical, but your first/primary IDE hard drive should
be ad0. If you are unsure, and you have stuff on these
other drives you care about, you shouldn't be using this quickstart
anyway. Get a book)
There is a chance that at this stage you'll get a message that goes
like: "WARNING: A geometry of 77504/16/63 for ad0 is incorrect. Using a more
likely geometry...". Your only option is to click [OK]. That is fine, and
since we'll be using the entire drive for FreeBSD it shouldn't be a
problem.
Now you'll be on a big scary black screen with weird stuff on it. Just press
A to select
the whole disk, then press Q to finish.
Now you need to choose a boot manager. We're not doing
anything fancy, so just choose Standard.
A box pops up about creating BSD partitions, you just need to click OK. Now
you're going to partition the disk (another weird black screen). For this
quickstart, we're going to just choose A for automatic, then
Q to
finish.
Now you should be on a Choose
Distributions menu. We're going to choose
Kern-Developer (we'll do X
later on).
You'll be asked if you want to install the ports collection. We'll do it
later... so choose No. It'll take you back to the Choose Distributions menu, and
you'll see an X by Kern-Developer now showing
you've selected it. So now cursor up to the top option Exit this menu (returning to the
previous) and select it.
Now you choose your installation media. Since we have this nice CD that you
made, choose the first option CD/DVD. You'll get a "Last
chance" box, just select Yes.
The system will churn for a while. Go get coffee, but don't be gone too
long... this really only takes a few mins. After it's done you'll get a
"Congratulations!" box. You're not really done, of course. This is just the
first part. We have some tweaking to do...
Choose OK. You'll be asked if you want to configure Ethernet or SLIP/PPP
devices. Choose Yes. On the next box, your network card should be
listed on the top of the list and highlighted. If it isn't, and all you see
are plip0, sl0, and ppp0, then FreeBSD couldn't detect it. (Did you forget to
change the "PnP OS" setting in your BIOS?) If all is cool, click OK. You'll
be asked about IPv6
configuration. Choose NO. You'll be asked about DHCP configuration. Choose YES
(unless you use static
IPs... if so, you know enough to figure certain upcoming parts out on
your own). A box should pop up as it scans for DHCP servers. Once it finds one,
a "Network Configuration" box will
fill the screen. You only need to enter a hostname here. Call it
anything you want (I'll use "freebsd" without the quotes) then keep pressing
[Enter] until you get down and choose OK.
You'll be asked if you want this to be a network gateway.
NO. Do you want inetd? YES. You'll be warned about it, choose Yes again.
You'll be asked about editing inetd.conf now. NO. Would you like to enable SSH login? YES. Do you want
Anonymous FTP access? No (for now, you can change this later). NFS server? NO. NFS client? NO. Do you want to
customize your system console settings? NO.
Now you'll be asked to set the time zone. Choose Yes. You'll be asked if your
clock is set to UTC. Probably
not, so choose NO. On the next menus you'll be asked to choose your time
zone. I'll assume you can figure out where you live. For me, I choose
2-America, then 45-United States, then 1-Eastern Time. I'm asked if "EDT"
looks like the proper abbreviation... YES.
You'll be asked if you want Linux binary compatibility. No (we can do it
later). Then you're asked if you have a PS/2, serial, or bus mouse. If
you have a PS/2 mouse, choose YES, but if your mouse is USB choose NO.
The following paragraph only applies if you
have a PS/2 mouse and chose YES on the previous question: On the next
menu, choose "Enable". Now move the mouse around to see if you have a cursor.
If so, choose Yes (if not, we have problems. Quit here and get a book or visit the
forums). You have to use the keyboard still to choose Yes as the mouse
isn't really on yet. Then cursor up to Exit and select that.
You're asked again about installing ports... choose No. Then you're asked
about adding more users... choose No for now, we can do that later. You need
to set the "root"
password... choose OK, then type the password twice as prompted (you will not
see your typing...DON'T FORGET YOUR PASSWORD). You'll be asked about going to
the general configuration menu... choose No.
You'll be returned to the sysinstall main menu. Use tab to highlight
[Exit
install
] and choose it. You'll be asked for confirmation,
with a reminder to remove the CD from the drive. Truth of the matter is,
FreeBSD has the drive locked at the moment so the eject button isn't going to
work yet. So just choose Yes.. Let the system reboot. Once you see your
normal starting screen, you should be able to eject the CD (don't wait too
long or else it'll start booting from the install CD again. If that happens,
just reboot the computer and try sooner to eject).
Partway through boot you'll get to a line that says kern.random.sys.seeded: 1
-> 0 with it pausing after. Above that you'll see it says
"Type a full screenful of random junk...". Well, you don't need a full
screenful, but type a line or two of random anything and then press the
[Enter] key. The boot will continue for a few more seconds.
Eventually you should have a login: prompt.
Congratulations! You have installed FreeBSD. But there's more we want to
do.
Unix-style systems like FreeBSD are inherantly terminal-based, and that's all
you have right now. Chances are you have expectations that involve a graphical user
interface (GUI), like on a Macintosh or Windows. If you
were building a server,
you'd install a server app
(or maybe a few) and leave it in text-mode, but since this speedthrough is
for a GUI
desktop, we'll keep going...
First we need to get a few tiny things installed. Since we don't have ports
going yet, we're going to use packages for now.
Login as username: root
Password: (whatever you chose)
First, we want to change the install source so we get newer stuff. Carefully
type the following exactly as shown, including all capitalization:
setenv
PACKAGESITE ftp://ftp.freebsd.org/pub/FreeBSD/ports/i386/packages/Latest/
Now, we need to install Xorg, the core piece that gives us a GUI. At the
# prompt, type:
pkg_add -r
xorg
This will churn for a long time while it fetches the numerous pieces that
make up Xorg. How fast this takes depends on the speed of your internet
connection.
Eventually you'll be at the # prompt again. Now, we need a window manager.
I'm going to take it a step further, and have you install a full
desktop-environment called Gnome (some people like KDE, I like Gnome. So
since this my quickstart, you get Gnome). First, type the following:
setenv
PACKAGESITE http://www.marcuscom.com/tb/packages/6.0-FreeBSD/Latest/
(The "6.0" isn't a typo, I know you're on 6.1) This line is
necessary because at the time of this writing, the official FreeBSD packages
site only had Gnome 2.12 and we want 2.14. Once this changes, that new setenv
line above won't be necessary. Now, install Gnome:
pkg_add -r gnome2
Once again, lots of fetching, even more than Xorg. Once you
have a prompt again, now we need to configure X. Type:
rehash

Xorg -configure
It just created a config file called /root/xorg.conf.new
which you will now copy and edit:
cp /root/xorg.conf.new
/etc/xorg.conf

ee /etc/xorg.conf
Find the "Files" section.
Add the following line into it:
FontPath
"/usr/X11R6/lib/X11/fonts/bitstream-vera/"
Now find the "Monitor"
section. Check if X was able to detect your monitor (should have sensible
values in VendorNameModelName and maybe Option "DPMS"). If not, you
will need to dig up the settings for your monitor. If you still have the
manual for your monitor, they should be in there, otherwise I've had good
luck going to monitor manufacturer's websites and searching for technical
specs there. Or just search Google for words like the vendor, model, and
"hz". You need the horizontal and vertical refresh rate ranges. For example,
my KDS 19" monitor wasn't detecting right so I defined it by-hand as
follows:
Section "Monitor"

    Identifier "Monitor0"

    VendorName "KDS"

    ModelName "VS-19sn"

    HorizSync 28 - 95

    VertRefresh 50 - 120

EndSection
Then again, even though this Gateway Vivitron 15 next to me was detected,
it doesn't work above 640x480 if I let it auto-detect. So a little hunting
with Google revealed the following
settings:
HorizSync 31 - 64

VertRefresh 50 - 120
The VendorName
and ModelName
values are cosmetic, use whatever. However, if you don't get the Horiz/Vert
ranges right you will have problems.
So it warrants some research. (ask for
help in the forums if you need it)
Ok that should be it for this file. Press the [ESC] key. After a slight
pauce, a box should come up. Just press [Enter] to select the first option
"leave editor", then [Enter] again to choose "save changes". You'll be back
to a # prompt.
Assuming you want sound, let's enabled that. Type the following:
echo snd_driver_load="YES" >
/boot/loader.conf
This won't take effect until you reboot, but we can type the following this
once to save having to reboot right now:
kldload snd_driver
We need a regular user now... we don't want to be actually running things as
root. Type:
adduser
You'll get asked a bunch of questions. They go like this (substitute your
name or whatever you want):
Username: jdoe

Full name: John Doe

Uid (Leave empty for default):

Login group [jdoe]:

Login group is test. Invite test into other groups? []:

Login class [default]:

Shell (sh csh tcsh nologin) [sh]:

Home directory [/home/jdoe]:

Use password-based authentication? [yes]:

Use an empty password? (yes/no) [no]:

Use a random password? (yes/no) [no]:

Enter password:

Enter password again:

Lock out the account after creation? [no]:

Username   : jdoe

Password   : *****

Full Name  : John Doe

Uid        : 1001

Class      :

Groups     : jdoe

Home       : /home/jdoe

Shell      : /bin/sh

Locked     : no

OK? (yes/no): yes

adduser: INFO: Successfully added (jdoe) to the user database.

Add another user? (yes/no): no

Goodbye!
Now use the command exit to log
out, and log in as this user. At the $ prompt,
type:
startx
If all goes well, you should get a graphical desktop with a gray background and
ugly white boxes with green trim. Don't worry, it gets better. This is
just a test. If you don't get that, and get errors instead, hit the
forums.
Assuming that worked, use CTRL-ALT-BACKSPACE (all at the same time) to kill X
and return to the prompt. Log out, and log back in as root. We have more to
install, and you can't install stuff as a normal user.
Now we need something prettier than that. Because you're a newbie, we
installed a fullblown desktop environment, one called Gnome (KDE is another popular option).
If you have a slower computer, it might not like Gnome (or KDE) too much, but the goal here
is to show off FreeBSD, not how to deal with slow computers (ask in the
forums about window-managers for underpowered desktops). So now we need
to set up a startup file for X so it launches Gnome instead of that other
thing you saw, twm. At the $ prompt,
type:
echo /usr/X11R6/bin/gnome-session >
~/.xinitrc
That'll cause gnome to be launched when we start X. Save and exit. At the
$ prompt, type:
startx
You should see X start, with a Gnome splash screen, then a desktop (with any
luck). If the screen resolution is not to your liking (or if part seems off
the screen), go to the Desktop menu, then Preferences, and choose Screen
Resolution.
Congratulations! You have a working X desktop, running Gnome. Gnome has a
bunch of neat things already built into it, so check out the Applications
menu.
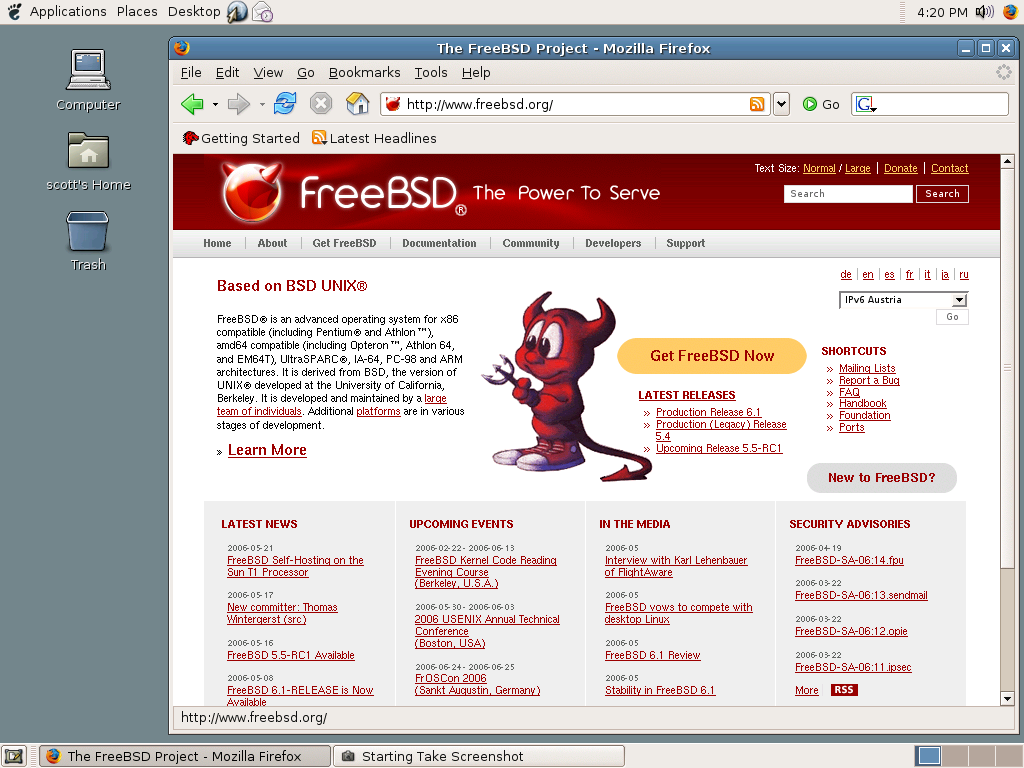
Click here for a final screenshot
Note: This is not really a tweaked system. There are a lot more things you'd
normally like to do. For example, fonts could be improved quite a bit, and
you probably want some applications beyond what's included with Gnome.
However, I wanted to keep things simple and just get you started. In order to
do more you'll want to learn how to set up the ports system and use it to
install more software.
Quickstart Part II
Exit out of Gnome (Desktop -> Log Out), then log out as the user you
created and log back in as root. Then run the following command:
portsnap fetch extract
This will take a while to run and will get you a copy of the ports tree. Now
install pretty fonts:
cd
/usr/ports/x11-fonts/webfonts
make clean
install
Now add the following line to /etc/xorg.conf using the ee program. Put it in
the "Files" section:
FontPath
"/usr/X11R6/lib/X11/fonts/webfonts/"
Log out as root, log back in as user, and startx. Go back into
Firefox and compare how web page fonts look to before.
Congratulations, you've graduated and just done your first install using the
proper ports system versus cheating with fetching binary packages. I would
strongly suggest you continue from here going forward to install applications
by cd'ing to the proper directory under /usr/ports and using "make clean
install". This will just fetch the sources, and do the actual build on your
computer.
If you've got the time and free-space on your computer, you can quickly flesh
out by adding the following meta-ports:
/usr/ports/editors/gnome2-office
(word processor, spreadsheet, project manager, database, groupware,
diagramming)
/usr/ports/x11/gnome2-fifth-toe
(image viewers and editore, instant messager, IRC client, multimedia
apps, news readers, and more)
Where to go from here
Below I will provide additional resources for you to continue your
exploration of FreeBSD:
Sites for FreeBSD news:
And lastly: The FreeBSD Mall